In my last post I described a different vCenter install that what you are used to. In this post I’ll be describing my personal experience as I upgraded vCenter 5.0 Update 1b to vCenter 5.1 – again this install is a big change from vCenter 3.x-5.0 installs:
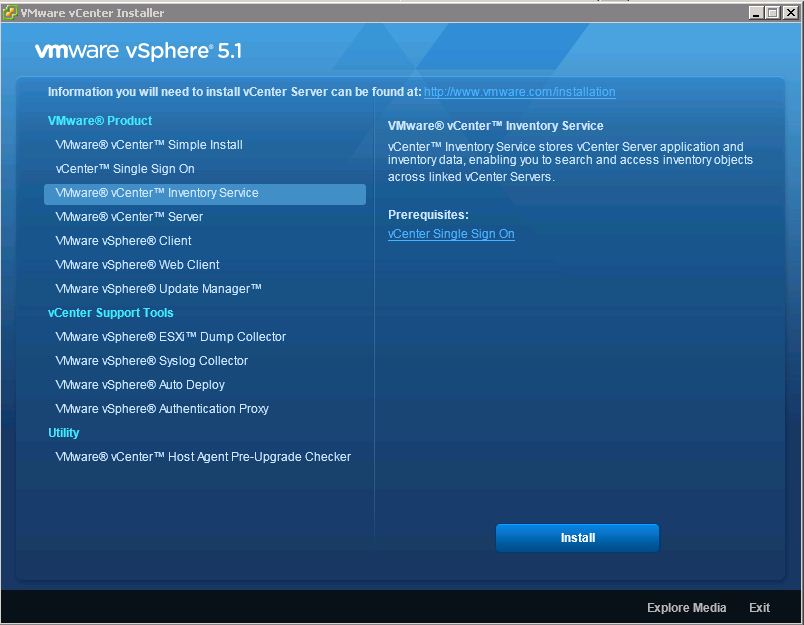
Upon launch, you are presented with the option of performing the “simple install” or another type of install that allows you to install the vCenter Single Sign On & vCenter inventory service on a different server than vCenter itself. In the examples that follow, I’ve chosen the “simple” install that turned out to be not so simple.

If you choose to do the simple install, I’d recommend running the installer using a domain admin account rather than the local administrator account we’ve used in the past. This should automagically allow single sign on to recognize the windows domain you use to access your vCenter. If you don’t use a windows domain to access, vCenter then use the local admin.
The first decision I had to make was the password for my admin user for single sign on. 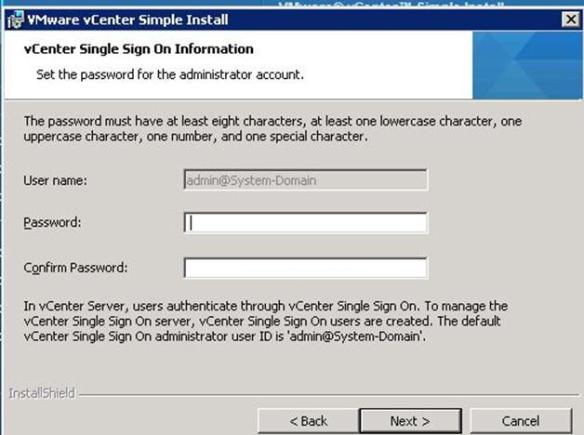
Strangely enough, VMware decided to peg the username of the single sign on to “admin@System-Domain” and does not allow you to change the username. This already has me skeptical of the new single sign on service that admittedly, I know nothing about at this point, but still it seems like a bad idea to hard code anything when it comes to authenticating.
Next, I was presented with the question of whether I would be using a local or remote database for my single sign on service. Since my vCenter was already installed with a remote database on a SQL server I picked the remote option which then explained how to create the database for single sign on using scripts located in a directory on the installation media.


After locating the SQL script I logged into my remote SQL server, launched SQL management studio and loaded up the SQL script. One thing I noticed and I highly recommend is that you read the comments in the SQL section carefully and make the necessary changes that are correct for your SQL installation. For instance you’ll need to change the location of your database, and log folder to properly create the database. Hopefully these are on different LUNs, but that’s a discussion for another time.

As you can see, I’ve changed my database path the E: and Log path to F: . I wasn’t sure about the index as I’m not a DBA and am not aware of any index file in SQL but I decided to keep it on E: with the database. This could have been an error. If anyone knows, please comment to tell me what a boneheaded move that was.

Next up, you are asked to provide information about your database server and the name of the database you just created. In the scripts above, I kept the database name as “RSA”, so I entered that information on the screen below with my SQL database server for host/ip, 1433 for the port and sa for my database because I use mixed mode authentication. No idea what the JDBC URL myself selection was for and I would recommend you leave this as the default unless you know why you are changing it.

Next, enter the fully qualified domain name of your vCenter server here.

On the following screen I decided to use the network service account to run the “Security Support Provider Interface Service”, whatever that may be. At this point vCenter seems to be getting more complex with more services running to make it work. As you might guess, I’m skeptical of the changes to vCenter I’ve seen thus far.

I kept the HTTPS port set at the 7444 default for vCenter Single Sign on.

I then was asked about my vCenter Inventory Service Database and whether I wanted to keep or overwrite my existing database. Well that should be simple right? We’ve never heard of this vCenter Inventory Service database before, so naturally we don’t have one to overwrite, right? WRONG.

Apparently starting sometime after vCenter 5.0 you had a vCenter Inventory Service installed along with vCenter. VMware must have had issues with the Inventory Service stepping on vCenter’s toes in large environments and made the decision to allow us to install it somewhere else. Now this sounds like an option I can get behind (which I didn’t take advantage of in this case, but may later).
Next, the installer crashed and burned with the error: “Installation of VMware vCenter Inventory Service failed. Install VMware vCenter Inventory Service, VMware vCenter Server separately by using individual installer rather than VMware vCenter Simple Install.”

With that, I clicked ok and ran just the vCenter Inventory Service installer from the autorun.exe screen. I was presented with the same exact screens for the vCenter Inventory Service portion of the simple install and the installation worked without error. Hrmpf. Next I launched the vCenter installation from the autorun.exe window.
Enter your vCenter 5.1 license key and move on from the screen below

Enter your vCenter database admin credentials

Next, you may receive a warning “This vCenter Server is being used by the following registered extension(s): VMware vSphere Update Manager. It’s OK, nothing to see here, these are not the droids you are looking for, move along.

Don’t forget to update vCenter Update Manager later or it won’t work is basically what this means above.
You’ll then be reminded to take a backup of your vCenter server if you want to upgrade your existing database. Why you’d want to upgrade the server but not the database is beyond me, but you are presented the option here, along with a CYA checkbox for VMware’s lawyers.

Next you’ll be asked whether you want to leave all your hosts in a disconnected state after upgrading vCenter by not upgrading the host’s vCenter Agent. The installer tells you that “vCenter Agent is installed on each host of the vCenter Server inventory. vCenter Agent enables vCenter Server to manage the hosts. vCenter Agent must be upgraded when vCenter is upgraded.”

If you are really worried about the vCenter Agent install causing a problem, select manual. In all 99.999% of other cases you’ll click “Automatic” above.
Next you’ll be asked to either use the System account or a specific service account to run vCenter 5.1 services. I chose “System” for my installation; you may have a specific account – so check your existing vCenter service if you’re performing an upgrade.

I kept all the default ports for my vCenter 5.1 upgrade installation. If you’ve customized any of these, here’s your chance to keep your port customization for vCenter 5.1

Deviating from the defaults, I chose the larger vCenter Server JVM memory setting. Managed Hosting Providers would be wise to have plenty of extra resources devoted for growth to your vCenter, so hopefully choosing “Large” here is a no brainer.

Next I received an error that was due to my vCenter server already being in a linked mode group. This seemed to be at the root of many of my problems with the vCenter install, so I’d recommend removing the server from Linked mode prior to upgrading and then re-adding it later if that is an option within your organization. The error I received stated that “Setup cannot join vCenter Server to the Linked Mode group. Refer to C:\Users\user\AppData\Local\Temp\status.txt and C:\Users\user\AppData\Local\Temp\jointool.log for more details. Click Yes to force this operation.”

I clicked yes to the above prompt. That resulted in another stern warning with “Error 28039. Setup cannot join vCenter Server to the Linked Mode group.” Sensing that I had little other choice here, I clicked OK.

I then was rolled back.

Finally, the install of vCenter 5.1 failed with the “The wizard was interrupted before VMware vCenter Server could be completely installed.” I’m then asked to “Refer to the log files vim-vcs-msi.log, vminst.log files on the installation server.

Undaunted by this depressing turn of events, I decided to try again, this time selecting just the vCenter Server installer.
I was asked by vCenter to enter information about my vCenter Single Sign On Administrator user name, password and Lookup Service URL

I begrudgingly entered admin@System-Domain for my user which appears to be change-able here, but make sure you use the same credentials during the install of single sign on. My guess is we can change the admin@System-Domain account to something more secure once its setup. For the service lookup URL I entered my vCenter fully qualified domain name along with :7444/lookupservice/sdk. Note: if you installed vCenter Single Sign On server somewhere else other than your vCenter server, you should enter its FQDN in the Lookup Service URL field.
Next you’re asked for the Lookup Service URL again and the vCenter Inventory Service URL. Again enter what you see below as long as you’re using the same server for vCenter Server, vCenter Single Sign On, & vCenter Inventory service, otherwise, use the FQDN where you installed them.

Doh. Fails. Another error yet again?

Either it’s my bumbling buffoonery or vCenter has some cleanup to do on this install. The failures I’ve encountered so far seemed to do with timing issues on services stopping and starting or vCenters being removed/added to linked mode in a timely manner during the upgrade. This error seems to indicate that the vCenter Inventory Service was not online when I went to install, so I checked it out. Sure enough:

I restarted the vCenter Inventory Service, re-launched the vCenter installation, re- entered the same information that you’ve seen in the screenshots thus far for vCenter Server and voila!

No problem, right? Well maybe not… There were a lot of trials and tribulations that just aren’t typically part of the same ol’ vCenter that we are used to. I was a bit surprised that VMware came out with these new features in a 5.1 release which seem to turn the vCenter paradigm on its head. Seem like this would have been better in the original release of 5.0 or the next 6.x version they came out with. It just seems strange to change vCenters architecture during the middle of the 5.x product cycle that is supposed to be synched with VCP 5 certifications. I mean I’m a VCP 5 and all of this stuff is new to me, I’ve never heard of it in any of the certification classes I took, nor the VCP 5 test. Anyways, perhaps I’m a bit too grumpy about them making this change. Hopefully further testing will reveal it to be a necessary and valuable change.
In my next post I’ll wrap up the vCenter upgrade with some screenshots on how to upgrade Update Manager 5.0 to 5.1 as well as the vSphere ESXi Dump Collector & vSphere Syslog Collector.